
HubSpot allows you to track your customer interactions, including the opportunities when you or your customer have discussed the possibility of a deal. A deal is an agreement between you and a customer to purchase a service or product.
HubSpot allows you to create, track, and manage a deal for your business. This tutorial will guide you through each option and describe the interface you will be using.
How to Create a Deal
You must be logged into the WordPress Administrator Dashboard to follow the steps below.
- In the main menu, click on HubSpot.
- Click on Contacts in the menu.
- Then click on Contacts drop-down menu in the top left corner.
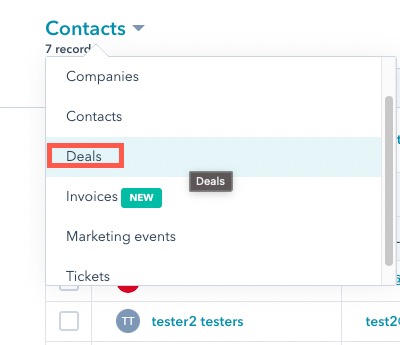
- Scroll down and click on Deals. A table listing all existing deals is displayed.
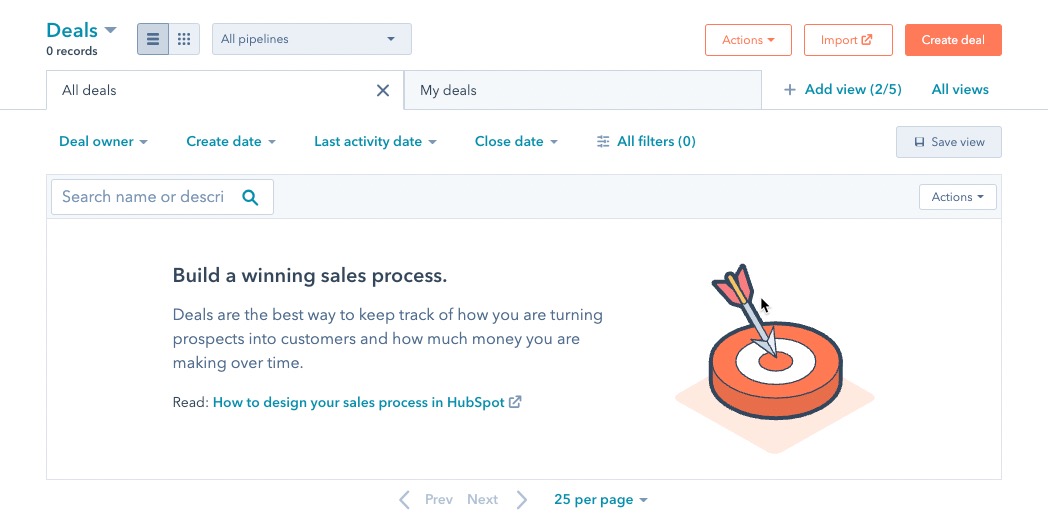
- Click on Create deal in the top right corner.
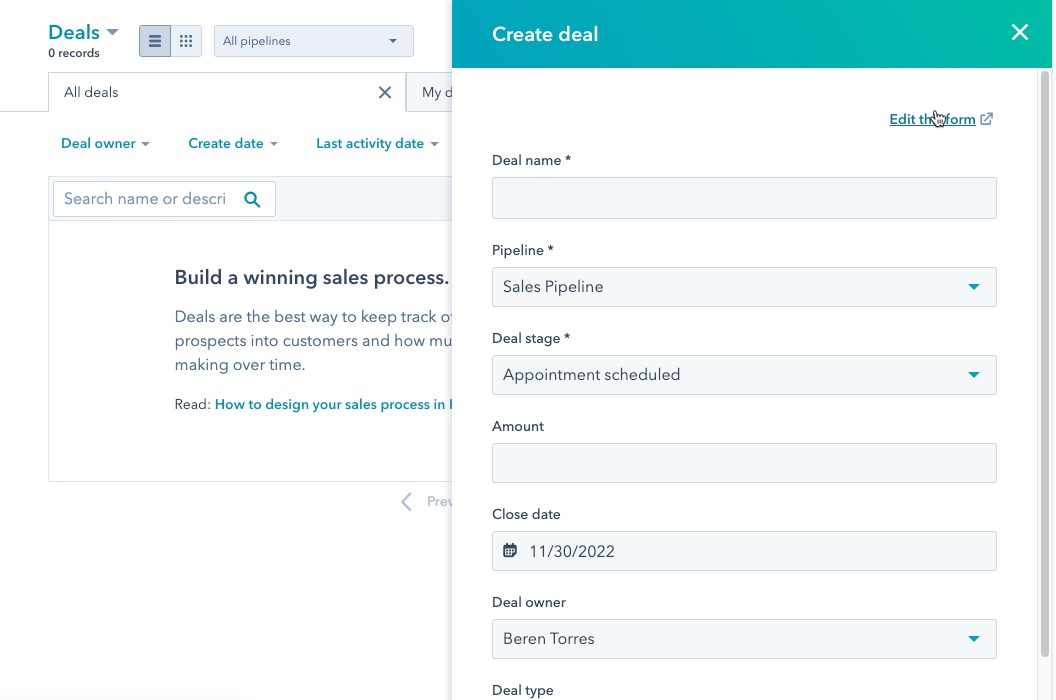
- Type in the Deal name.
- Select the Pipeline – requires an upgraded account to choose something other than Support.
- Select a Deal stage that describes the progress of the deal you are recording. To understand the deal stages scroll down to the next section in this tutorial.
- Type in the Amount involved in the deal.
- If you have a Close date, click on the date in the form to pick a date from the calendar.
- Select a Deal owner or click on No owner from the drop-down menu.
- Click on the drop-down menu for Deal type to select New Business or Existing Business.
- Select a Priority for the deal – Low, Medium, or High.
- The next section is labeled “Associate deal with” and starts with Contact. Select single or multiple contact(s) from your HubSpot and click on the checkbox to include timeline activity.
- The next entry uses the Company contacts from your HubSpot CRM account. Like contacts, you can also click on multiple company contacts and include timeline activity.
- The final item in the Deal form is labeled Add a line item. If you have a product library, you can select an item and include quantity.
- You can scroll to the bottom of the form and click on Create to save your entries.
Each of these items can be added during the creation of the deal or added to the Deal record later.
The Deal page shows details of the deal in a 3-column format. This is an example of a newly saved deal: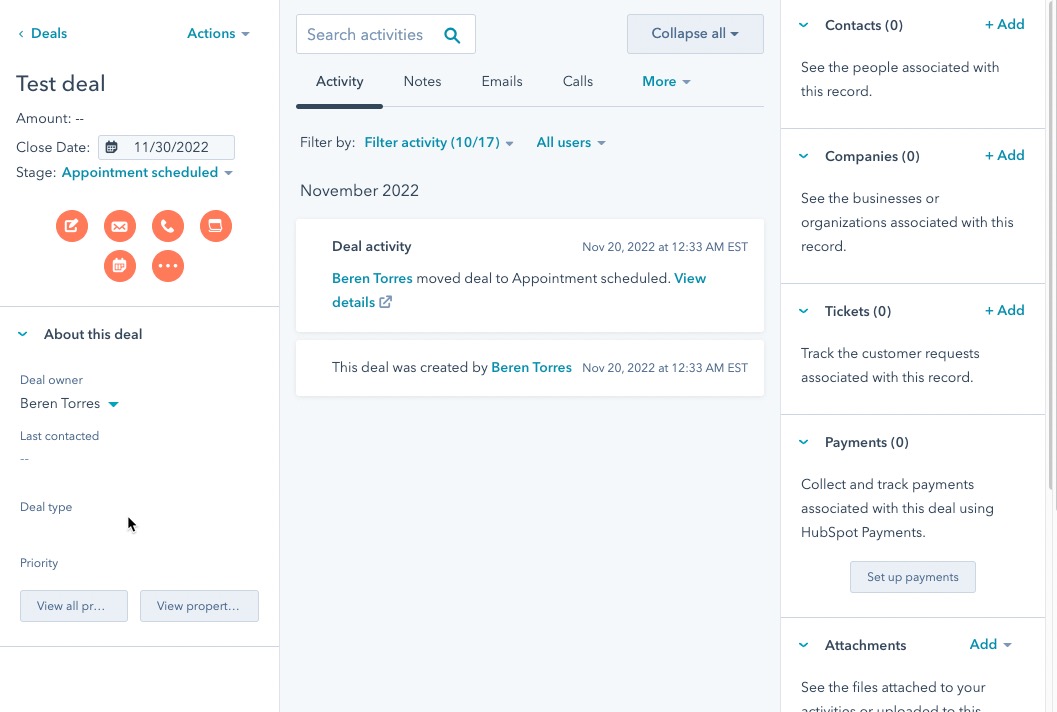
Understanding the Stages of a Deal
It is important to understand the stages of a deal you have created with a customer or company. There are six stages from which you can select:
- Appointment scheduled – a meeting has been scheduled to discuss the deal.
- Qualified to buy – you have determined that the customer is qualified to purchase your service or product.
- Presentation scheduled – a presentation highlighting your service or product has been scheduled
- Decision maker brought-in – your deal has been moved to a decision maker.
- Contract sent – a contract for your deal has been published and sent to the customer.
- Closed won – the deal was closed, and the client was converted to a sale.
- Closed lost – the deal was closed, and the client did not purchase.